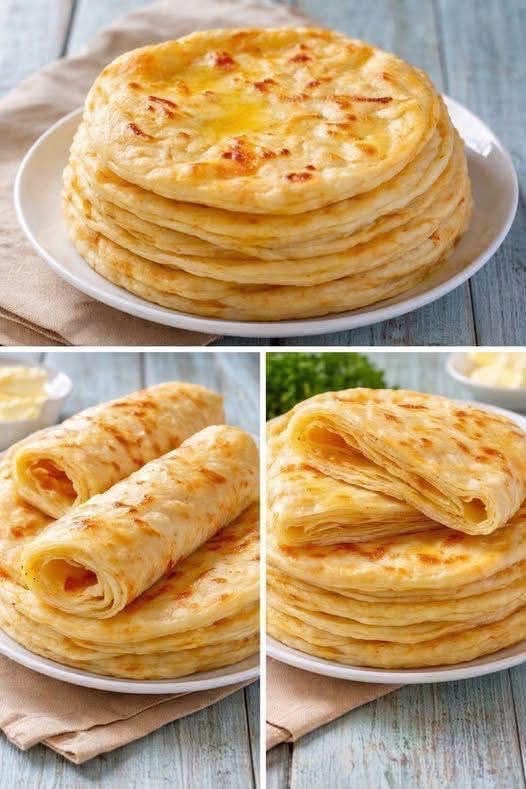
When it comes to traditional North African breakfast staples, few things can compare to the sensory delight of a freshly baked Moroccan Msemmen. This iconic, multi-layered square flatbread is a masterpiece of culinary lamination. It balances a beautifully golden, slightly crisp exterior with an incredibly soft, chewy, and buttery interior.
Whether you are looking to elevate your morning breakfast spread or master a timeless baking technique that will impress your family and friends, understanding the science behind the dough and the folding process is essential. Mastering Msemmen requires simple kitchen ingredients but relies entirely on a methodical technique to unlock those signature flaky layers.
The Secret to Achieving Perfect Laminated Layers
Achieving the characteristic flakiness of Msemmen does not depend on commercial yeast or chemical leavening agents. Instead, it relies on a unique combination of gluten development and a precise oil-and-semolina barrier technique.
The Power of Fine Semolina
Traditional Msemmen dough utilizes a strategic blend of all-purpose flour and fine durum wheat semolina (finot). While the white flour provides the high elasticity required to stretch the dough paper-thin without tearing, the fine semolina introduces structural integrity, a beautiful golden color, and a subtle, satisfying toothsome bite.
The Lamination Barrier
Much like European puff pastry or French croissants, the layers in Msemmen are separated by a fat barrier. As the dough is stretched thin, it is generously coated with a mixture of melted butter and vegetable oil, followed by a light dusting of dry semolina. When the flatbread hits a hot griddle, the moisture within the butter turns to steam. This steam expands, pushing the thin dough layers apart from the inside, while the dry semolina grains absorb excess fat to prevent the layers from fusing back together.
Authentic Step-by-Step Msemmen Recipe
This traditional recipe breaks down the classic method into simple, highly manageable steps for the modern home baker.
Ingredients Checklist
- All-Purpose Flour: 2 cups
- Fine Durum Wheat Semolina: 1 cup (plus extra for dusting)
- Warm Water: 1 to 1.25 cups (as needed)
- Fine Sea Salt: 1 teaspoon
- Granulated Sugar: 1/2 teaspoon (optional, for optimal browning)
- Vegetable Oil: 1/2 cup (for stretching and shaping)
- Unsalted Butter: 1/2 cup (melted and combined with a splash of oil)
Preparing and Kneading the Dough
- Combine Dry Ingredients: In a large mixing bowl or on a clean work surface, whisk together the all-purpose flour, fine semolina, salt, and sugar.
- Form a Cohesive Dough: Gradually pour in the warm water, using your hands to incorporate the flour until a rough, sticky dough forms.
- The Kneading Phase: Knead the dough vigorously for 10 to 12 minutes (or use a stand mixer fitted with a dough hook for 7 minutes). The goal is to develop the gluten network thoroughly. The dough should transition from rough and sticky to incredibly smooth, pliable, and soft to the touch.
- Resting the Dough: Divide the smooth dough into equal-sized, golf-ball-shaped portions. Coat each ball lightly with vegetable oil to prevent a dry skin from forming. Place them on a tray, cover with plastic wrap, and let them rest undisturbed for 20 to 30 minutes. This step relaxes the gluten, making the dough easy to stretch later.
The Masterful Folding and Baking Technique
Once your dough balls have adequately rested, you can begin the traditional folding process that creates the beautiful square geometric structure.
Shaping the Squares
- Oil Your Workspace: Generously grease your clean countertop or a large work surface with vegetable oil. Take one dough ball and press it flat with the palms of your oiled hands.
- Stretch Paper-Thin: Working from the center outward, gently pull and slide the dough until it expands into a large, translucent circle. The dough should be so thin that you can practically see your countertop through it.
- Apply the Fat and Semolina: Drizzle a generous tablespoon of the melted butter mixture over the entire surface, smoothing it out with your hands. Lightly dust a pinch of dry fine semolina across the oiled surface.
- The Envelope Fold: Fold the top third of the circle down into the center. Fold the bottom third up over it, creating a long, narrow rectangular strip. Apply another light smear of butter and a pinch of semolina. Finally, fold the left side inward to the middle, and fold the right side over it. You will be left with a neat, multi-layered square packet. Set it aside and repeat with the remaining dough balls.
Baking to Golden Perfection
Preheat a heavy-bottomed cast-iron skillet, griddle, or traditional Farrah over medium-high heat. Take your first folded square packet and gently pat it out with your fingers to flatten and expand it slightly, maintaining its square shape.
Lube the hot pan with a drop of oil and lay the flatbread down. Cook for 2 to 3 minutes until tiny bubbles begin to puff up on the surface and the bottom develops gorgeous, dark-golden spots. Flip the Msemmen over and cook the secondary side for another 2 minutes. For the absolute best results, gently rotate the flatbread with your fingertips as it cooks to ensure even heat distribution.
Classic Serving Suggestions
Moroccan Msemmen is designed to be enjoyed tearing-hot right off the griddle.
- The Sweet Tradition: Serve them warm alongside a small bowl of melted butter mixed with raw honey. Dipping the flaky layers directly into this sweet glaze is the traditional way to enjoy them.
- The Savory Twist: Pair them with soft goat cheese, cream cheese, or a drizzle of cold-pressed olive oil for a satisfying, savory balance.
- The Perfect Beverage: No Moroccan breakfast spread is complete without a piping-hot glass of traditional Moroccan mint tea, poured from a height to create a beautiful, frothy foam.